Peter's Bonsai Blog
![]()
![]()
![]()
![]()
![]()
| Peter's Bonsai Blog |
|
|
|
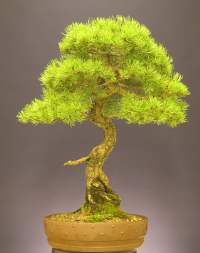
Controlling Growth in PinesThe majority of trees have a natural tendency to concentrate their growth at the apex. To counteract this, and thereby allow the development of a variety of styles of tree, Bonsai growers have developed a technique to balance the flow of energy throughout the tree. Pines have a particular and unique growth pattern which Bonsai growers can use to produce new shoots where and when needed, with a fair degree of certainty. In the wild, most pines rarely produce growth from old branches and only do so in response to damage or stress. Bonsai growers have developed a pruning technique, which utilises this response to control the pattern of a tree�s development. The secret is in the timing and extent of the pruning. |
|
|
|
||
|
The technique to be used will depend on what you are trying to achieve, and can be used to produce new shoots where and when needed, with a fair degree of certainty. In any given year you will probably want to use slightly different techniques on different parts of the tree. The way in which we treat trees "in development" will be different from the way we treat established trees. The technique used depends on what we are trying to achieve. |
||
|
In the wild a pine's natural growth pattern is for branches to reach out towards the light. As a result the growth tends to be in clusters at the ends of long bare branches. If you are developing a collected or neglected pine you will probably want to build up the foliage mass closer to the main trunk. We therefore need to encourage the tree to form buds closer to the main trunk. The technique for achieving this is described below. If you have an established tree and want to retain the same overall size and shape, last year's growth will have to be removed and we need to use a technique that simply replaces it at the same position on the branch. The technique is similar to that for encouraging back budding but the difference is in the timing and the extent that we pinch off the new growth. Before I explain the techniques referred to, I would like to explain the pattern of new growth in pines.
As the tree starts to grow in the early spring, the extension growth (the new shoot) takes the form of a �candle�. The following notes describe what happens. There are essentially 3 stages;- (Click any image to see a larger picture) |
||
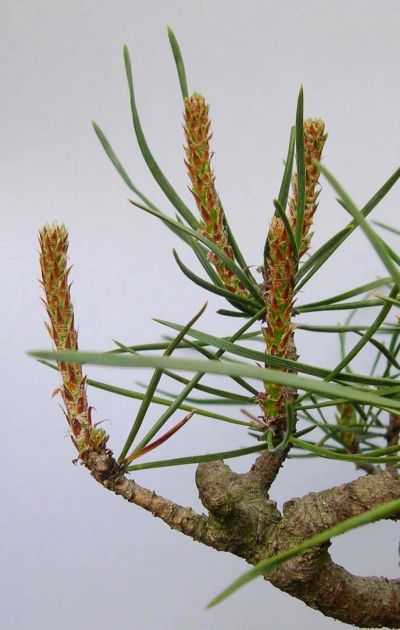
| Stage 1 - The new buds elongate to form "Candles"In Spring the buds don't actually open to allow the embryonic shoot to emerge. Instead they gradually elongate, tearing the paper like sheath, which protects them. These elongating shoots look like, and are called �candles�. As the sheath disintegrates you will see tiny bright green scales, which are the developing needles. We shall refer to this as the first stage |
|
|
|
|
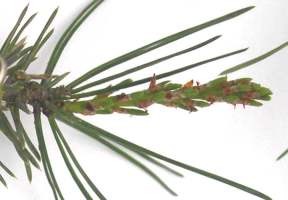
Stage 2 - The needles peel away" By the time the candles reach about half their eventual length, the groups of needles, about 2-mm long, start to slowly peel away. When they stand at about 20 degrees to the candle, they begin to separate into individual needles. |
|
|
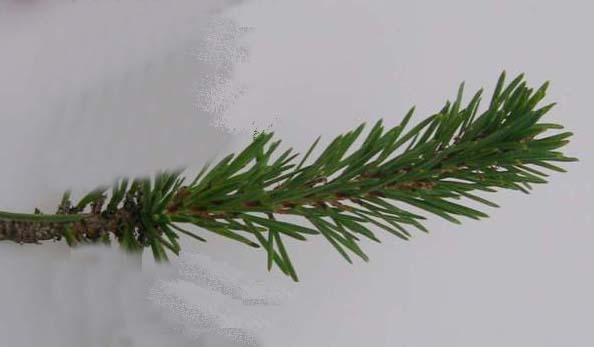
Stage 3 - The needles separate from one another. The candles then elongate further and the needles lengthen and separate entirely from each other, darkening in colour as they do so. The semi mature needles are almost as dark as last years, but only half the length of full-grown needles and are still shiny and slender. This we shall call the third stage. |
|
|
|
The
development of new growth is similar for all two needle pines throughout the
world. However, the timing and rate of growth will vary, dependent upon your
local climate. In some parts of the world, pines can produce 2 lots of growth each
year. Much of the advice on the internet (particularly relating to the two
needle Black Pine) can be confusing because it relates to the growing
conditions in other parts of the world. The following comments relate to the
growing conditions in Scotland, where we have a short growing season and only
one new growth each year. Before you
start pruning, there are a number of key things to remember;- 1. A Bonsai is a living thing which changes over time. Most Bonsai are
�in development� most of the time. A show specimen only becomes �picture
perfect� and at its peak of perfection after many years of training. When it
has reached that peak it may need to be restructured by thinning the foliage,
or possibly removing a branch that has become too long, or a foliage pad that
has become too dense. 2. All live branches on a pine must have needles to sustain the branch
and to pull the sap towards the growing area. Unlike deciduous trees, if there
are no needles (or not enough) the branch will die. 3. The natural growth pattern on a pine works on a three year cycle and
in the wild, all branches will have needles which are one, two, and three years
old. In bonsai cultivation, because we tend to remove the needles, it is common
to only have one and two year old needles. 4. Your tree must be healthy vigorous and
established in its pot for a minimum of two years before you start candle
pruning. How to develop Back Budding If you are developing a collected or
neglected tree, or simply want to increase the foliage mass, you need to
encourage the production of new buds on old wood closer to the trunk. Remember
this requirement is contrary to the natural growth habit of the tree in the
wild and is based upon a knowledge and experience of the trees response to the
technique. Back budding occurs when existing
dormant buds are stimulated to grow. Every pair of needles has a tiny and
dormant bud at the base. They are so small that you cannot see them with the
naked eye. They can be stimulated to grow by a combination of removing the
older (second and third year) needles and by pinching the new candles. Most
books describe the process of plucking the needles, but I prefer to cut them
off about 2mm from the base. This avoids the possibility of damaging the
dormant buds if the needles are pulled out to roughly, or in the wrong
direction, whereas the cut needles will simply wither and fall off without
damaging the bud. In Scotland, trim the candles June or late
August, dependent upon what you�re trying to achieve. There are two ways to trim the candles;- 1.At the beginning of June, when the new candles are almost fully extended, remove all of the new growth. This will result in new buds at the growing tip where the candle has been removed and a smaller number of adventitious buds further back on the branch or, 2. at the end of August, remove 75% of the spring candle leaving just 4 or 5 pairs of new needles. This will encourage a greater number of new buds to appear on the old wood. They sometimes appear on the old wood late in the year, but will be very small and barely visible to the naked eye. In most cases they appear in the spring of the following year. Whether they appear late in the year or the following spring is directly related to the weather and climate conditions in your garden. It will vary from one part of the country to another. When removing any part of the candle it is essential that you leave some of the existing needles to sustain the branch. If you remove all green material from the branch it will die. Remember; the natural tendency is for the tree to produce new growth at the end of the branch. Therefore, in order to encourage new growth closer to the trunk; when you see buds appearing on old wood, any buds that have appeared at the growing tip should be removed. How to Replace Existing Foliage. This technique is usually more relevant to "finished trees",
where the size and shape of the tree is well established and you want to
maintain the same image. As before, the technique is to pinch back the candle,
but this time, do it in early June before the candle is fully grown. Remove
about 50% of the candle and this will produce lots of new growth around the
point that you pinched out the candle. Some adventitious buds may appear
further back but these can be ignored as they will die off naturally. Needle Plucking In Scotland, trim the needles in
June / early September, shortly after you have cut the candles. Needle plucking / trimming is done for a number of reasons;- 1.
To
reduce the density of the foliage. By
removing old needles we open up the foliage to allow light and air into the
heart of the tree. 2.
To
assist with the development of new buds. Remember, new buds are developed from dormant
buds at the base of a pair of needles. They are so small that you cannot see
them with the naked eye. They can be stimulated to grow by a combination of
removing the older needles and by pinching the new candles. Most books describe
the process of plucking the needles, but I prefer to cut them off about 2mm
from the base. This avoids the possibility of damaging the dormant buds if the
needles are pulled out to roughly, or in the wrong direction, whereas the cut
needles will simply wither and fall off without damaging the bud. 3.
To help with wiring. Removing the needles makes it
easier to wire the branch into position. If you want to extend a
branch, it is preferable to leave the old needles in position, as the more
needles on the branch, the more vigorous it will be. Remember that pines need foliage to encourage
sap along the branch to the growing tip.
If there is no green material on the branch it will die. |
||
|
The following images show the various stages of bud development |
||
|
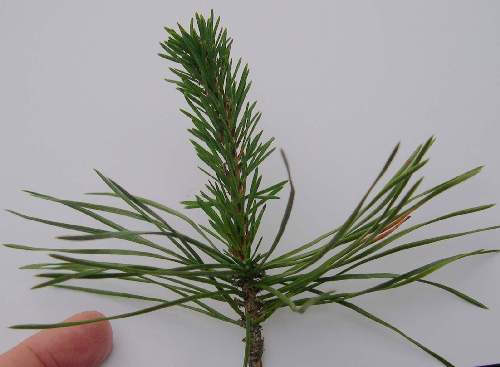
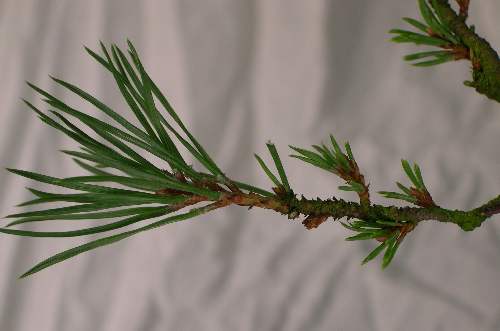
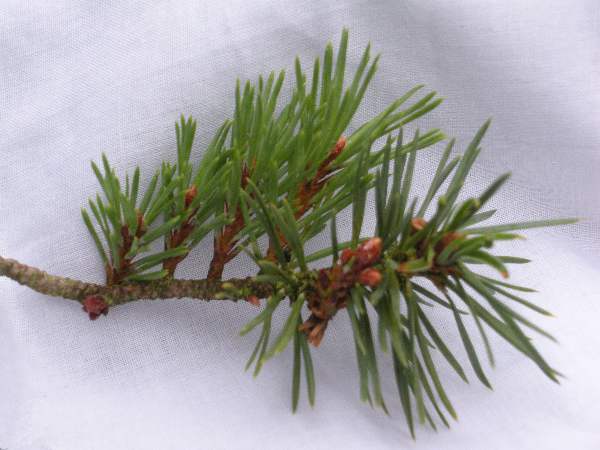
This is an typical example of what the new growth looks like, once the candle has opened. Note that the branch still has its old needles. |
|
|
|
|
|
|
|
|
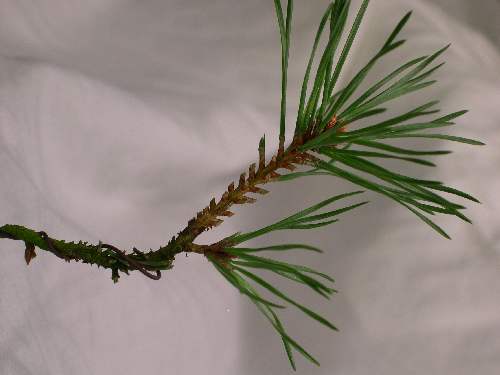
Towards the end of June, when the new growth has opened fully and new buds are appearing at the tip, trim back the majority of last years needles to encourage back budding. Althouugh many books suggest that you remove the needles by plucking them out, I recommend that you cut the needles with scissors to leave a 2mm stub. The cut needle stubs will then wither, turn brown, and fall off. |
|
|
|
|
|
|
Another example of new growth with the old needles removed. |
|
|
|
|
|
|
|
|
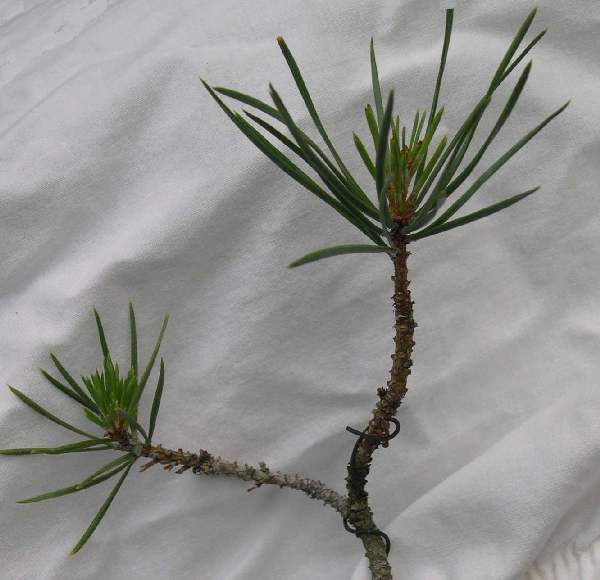
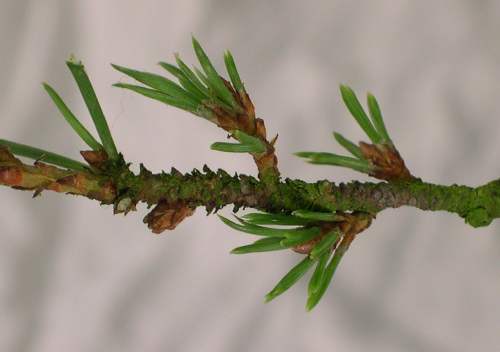
This is an example of back budding on old wood. The buds appear on old wood during the first
growing season after you have cut off the old needles. You are also likely to get buds appearing at
the tip of the branch. If you want the branch to extend leave these new buds at
the tip, but remove the buds that have appeared further back. If you want to shorten the branch, you need to
encourage the development of the new buds that have appeared on old wood. To
help the process, remove the bud at the tip but leave some of the old needles
in place. These needles at the tip are required to draw the sap along the
branch and thereby sustain the new buds. If you remove all the needles the
branch will die. |
|
|
|
|
|
|
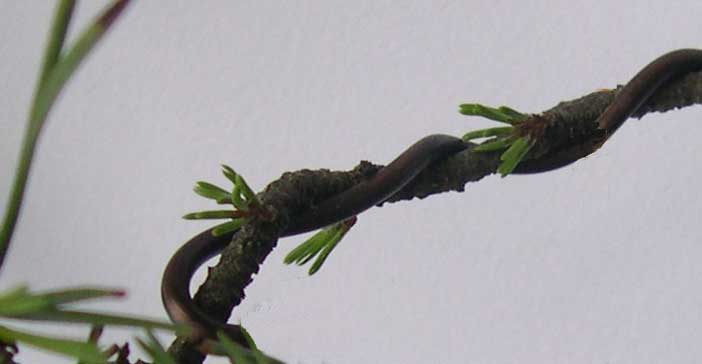
As the new buds swell, they will start to push out new needles. Even though these new buds look healthy, they are not big enough to survive and will die if there are no needles at the end of the branch. to draw the sap along the branch. These needles at the tip are required to draw the sap along the branch and thereby sustain the new buds. If you remove all the needles the branch will die.
|
|
|
|
|
|
|
|
|
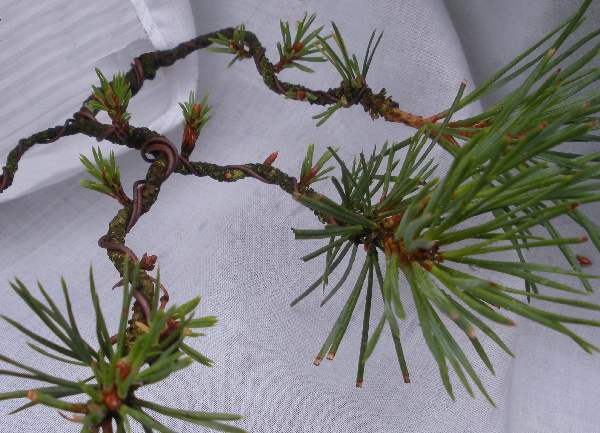
As the buds continue to grow they push out new needles and become shoots. Note the number of needles left on the branch to draw the sap along and thereby help sustain the new shoots on the old wood. If you remove all the needles at the tip of the branch before the new shoots are big enough to sustain thenselves - the branch will die. The new shoots need to be about 18mm long, before they are big enough to sustain themselves.
|
|
|
|
|
|
|
A close up of the new buds, developing into shoots.
|
|
|
|
|
Another example of how many new buds can be generated on old growth, (if you get really lucky).
|
|
|
|
|
|
|
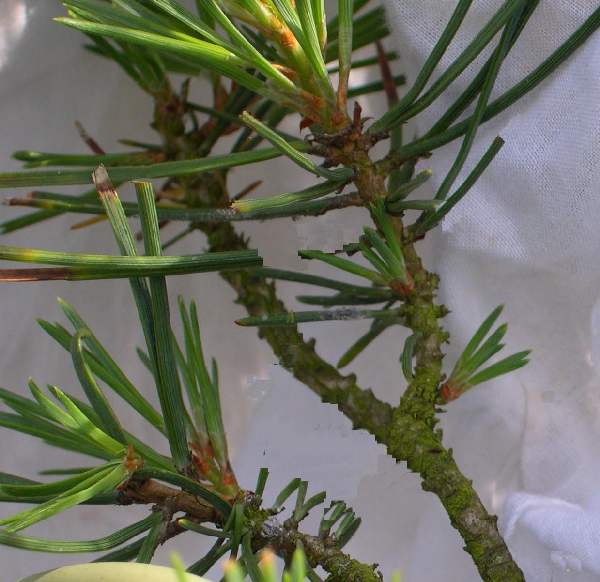
Another example of the buds that have appeared on the old growth and are developing into shoots. As they get bigger you can remove some of the needles from the end of the branch.
|
|
|
|
|
|
|
|
|
In this example the back budding has been very sucessfull. The new shoots are big enough to survive and are extending well. This branch may now be shortened by removing the needles from the end of the branch. However there are really to many shoots appearing and some will have to be removed. to maintain the vigour of the branch.
|
|
|
|
||